|
|
I just moved the web site to a new server.
If you have any problems with pages or downloads,
let me know, Fly safe, Waiter
30 MAR 2007. Added Infinity Hydraulic drawings.
I posted several hydraulic diagrams for the Infinity Landing Gear .
You can find these on the INFINITY GEAR screen.
25 MAR 2007. Engine Compartment, Gear

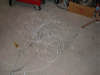
 I was concerned that something like this would happen for real (Thimble gets twisted around). So, I replaced the thimble with an AN100 thimble.
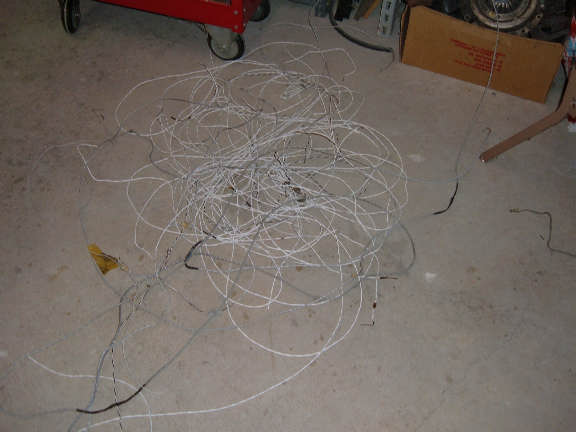
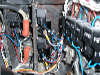
 Cleaning up wiring, getting rid of old wires (about 3 lbs). ALSO. Updated the wiring diagrams. I'm adding a page for how the ignition system is wired, but I need to talk to Electroair (Jeff Rose Ignition) as I have a couple questions on how the unit is wired (I can't find my manual). I'll post the updated diagrams as soon as I finish the drawing for this page.
24 MAR 2007. Engine Compartment
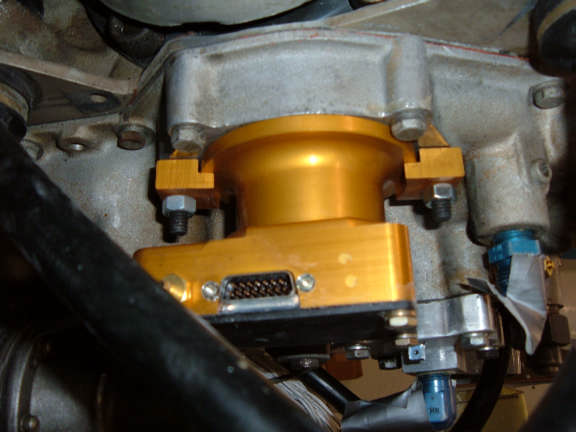
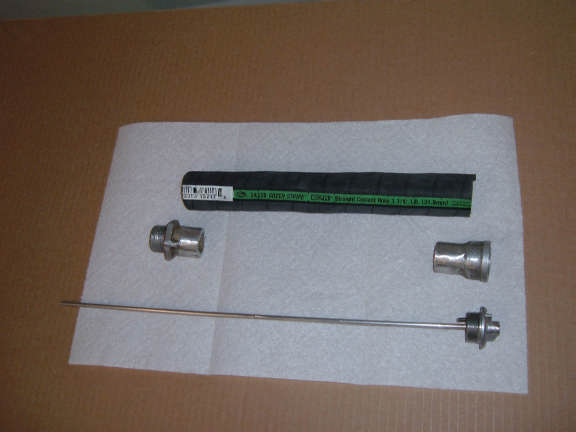
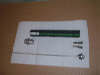
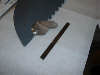
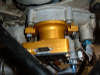 These are the shorter mounting studs for the E-Mag. They're about 1 inch shorter than the original.
The E-Mag now fits nicely where the left Bendix Magnet used to be.
These are the shorter mounting studs for the E-Mag. They're about 1 inch shorter than the original.
The E-Mag now fits nicely where the left Bendix Magnet used to be.
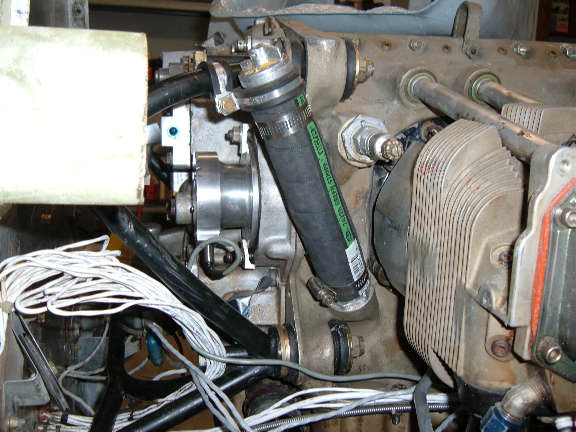
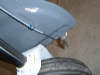
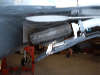
 This is the "modified" oil dip filler tube. I'm using a short section of reinforced cooling hose to make a slight bend to clear the air intake for cooling plenium.
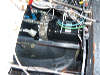
18 MAR 2007. Engine Compartment
Accessory mounting on the firewall
I've gathered all the components that need to be mounted on the firewall; Electronic Ignition systems, fuel and oil pressure sensors, Oil Filter assembly, Crankcase Vent Oil Seperator, Gasculator, and the Oil Cooler.
I ordered hoses and fittings for the new fuel line routing and the oil and fuel pressure sensors.
Combustion Air, Carb Heat, Oil Cooling
The largest task ahead is to plan and build the routing of air for combustion, carb heat, and oil cooling. During my planning and construction of the new cowling, I came up with a rough idea, now its time to make that idea happen. This is what I want to do:
Combustion Air - The pilot can select between three sources for combustion air, (1) Normal - Filtered air, (2) Unfiltered RAM air, and (3) Unfiltered HEATED air. When I made the cowling, I included a small ram air intake on each side of the lower cowling, One of these can be used for Combustion RAM air, the other is for the Oil Cooler.
Carb Heat Air - Depending on which one is easiest (most reliable) to impliment, I'll either use a small heat muff around the exhaust, or I'll use heated air coming from the oil cooler.
Oil Cooling Air - Cool air is supplied by one of the lower cowl ram air intakes. Hot air exhust will be ducted to the rear of the lower cowl and vented at the rear, lower lip. The ducting will be an integral part of the lower cowling. I may use this air as a source of carb heat, undecided.
I spent most of the afternoon moving things around and drawing on paper. I'm trying to come up with a fast, simple, reliable system
17 MAR 2007. 2 lbs in a 1 lb sack - The firewall
With the gear installation complete, its time to start putting the firewall back together. Actually, its not "putting back together", its 'figuring out where to put everything". Changing to downdraft cooling requires a complete re-engineering of the engine compartment and firewall.
Mag Change
I'll be replacing the original "left" Bendix mag with an electronic ignition from E-Mag. When finished, I'll have dual electronic ignition systems, powered by two seperate electrical systems.
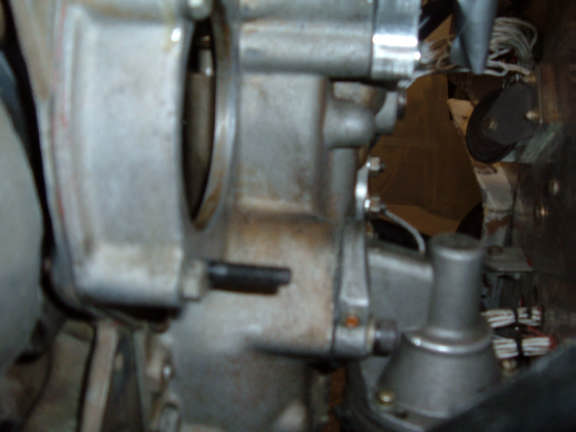
I removed the Bendix mag and the impulse coupler extension. I also removed the original "long" mag mount studs. I need to replace these with studs that are an inch shorter to accomidate the E-Mag. A quick test fit of the E-Mag indicates it will fit just fine. A nice feature of the E-Mag is the ability to remove the coil pack from the top and mount it seperately on the firewall. I'm not sure I'm going to do this as firewall real estate is at a premium. Regardless of where I mount the coil pack, I intend to blast it with cooling air.
The coil pack and the electronics for the Electroair system will be mounted on the firewall (same as before) and will also have cooling air blasted at it.
15 MAR 2007. Main Gear Hydraulic
11 MAR 2007. One Hour Ahead (DST)
Gear Doors
Finished the left gear door. Alignment looks very good, The Grasscutter door is rigged and alignment is also good. This pretty much wraps up the landing gear and doors. However, I still need to install my overflow / filler bottle for the hydraulic system.
Extend Bypass Switch
When I installed the new UP and DOWN relays last week, I forgot to rewire my Emergency Extend Bypass Switch. This switch bypasses the landing gear control computer and connects directly to the DOWN relays for both the nose and main gear, AND, it also allows me to extend the struts. Anyway, I got this fixed. I also updated the electrical drawings for both the new relays and the bypass switch. Click HERE to view the electrical diagrams. They're in a PDF format (135kb).
Wheel Alignment
I measured the wheel alignment again. I took an 8 ft straight edge and laid it against the tire. I then marked 7 ft behind the tire, and 7 ft in front of the tire. I did this with both main tires. I then measured the distance between the marks, front and rear. I got 103 inches for the front marks, and 105 inches for the rear marks. These measurements calculate to about .36 deg Toe-In. Perfect.
GEAR CONTROLLER
I found and fixed a minor bug in the Waiter's Landing Gear Controller. With the gear UP, the UP lights were blinking when I put the switch in the OFF position. They shouldn't do this.
With the bug fixed, if the gear is retracted (UP LOCK), you can place the switch in the OFF position and it will turn off the RED - UP LOCK lights. The gear controller is still active and monitors the gear, but the three RED lights are extinguished. I did this because these lights are a distraction, especially during cruise.
No other status lights are disabled when in the OFF position, ONLY the UP LOCK lights.
8 MAR 2007. Left strut back on the plane.
I received the new O-rings from JD at Infinity Aerospace. These are for the upper slide inside and out.
The inside of the old o-ring was flattened on the mating surface and was a little hard. The outter o-ring was soft, but had a couple knicks in it .
The left strut is reassembled with new o-rings. I cycled it a couple times. Everything looks good so far.
7 MAR 2007. Left strut removal.
I developed an internal leak in the left strut after I reassembled it last week. (URGH)
After Talking to JD at Infinity Aerospace, he said it was most likely a burr developed on the inside of the tube when I installed the AN4 hose fitting. Then when I reassembled the strut, this burr damaged the o-rings.
Yup, sure as heck. After I removed the strut and disassembled it, I could see / feel a small burr where the strut compress AN4 fitting is installed. A little grinding with the Dremel and the burr is no longer there. I'll re-assemble after I get a new set of o-rings.
4 MAR 2007. 30 Minute Job - ALL DAY.
Hydraulic Pump Power Relay
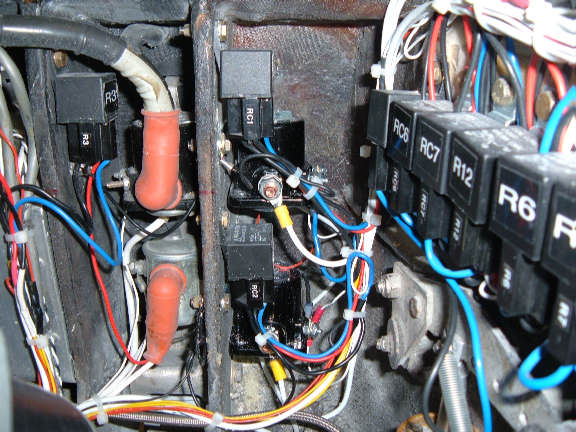
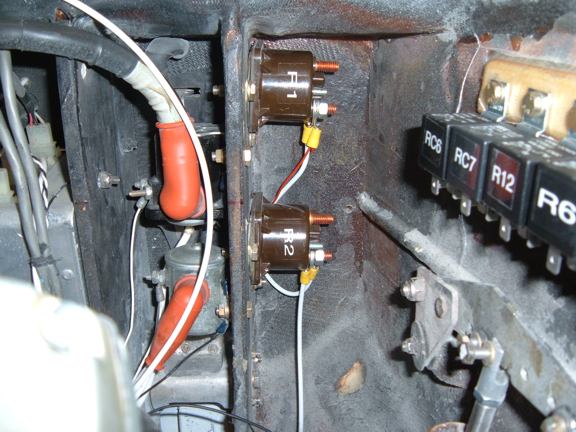
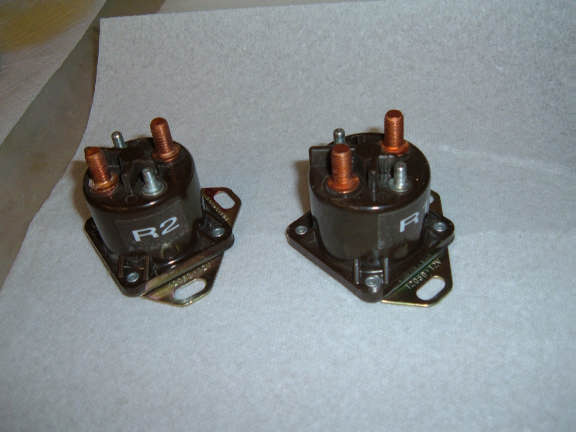
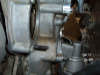
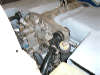
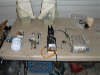
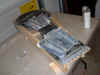
 I've had a couple instances were the original Hydraulic pump DOWN relay (shown right) wouldn't pull all the way in. It would hum and get warm. I decided to replace both relays (UP and DOWN) with regular "Starter" relays (shown left: I should have done this on day one).
Starter relays aren't 100% duty cycle relays (like a Master Relay), but are good for intermittent duty, like running a hydraulic pump. The relays I'm using are Part # 22735 from Aircraft Spruce. These particular relays look like a standard automotive starter relay, they also have an "I" (ignition) terminal. The "I" terminal connects to the main power terminals when the relay is energized.
I figured replacing the relays would take 30-45 minutes, NOT. :-(
I had to change my control wiring that energizes the solenoids. With the old relays, I supplied a ground to energize them. However, to energize the new relays requires supplying 12vdc to the "S" terminal. The Starter relays have one terminal for applying power "S" (start), and the "ground" is the mounting bracket. The old relays had a terminal for each side of the coil. (right >)
I've had a couple instances were the original Hydraulic pump DOWN relay (shown right) wouldn't pull all the way in. It would hum and get warm. I decided to replace both relays (UP and DOWN) with regular "Starter" relays (shown left: I should have done this on day one).
Starter relays aren't 100% duty cycle relays (like a Master Relay), but are good for intermittent duty, like running a hydraulic pump. The relays I'm using are Part # 22735 from Aircraft Spruce. These particular relays look like a standard automotive starter relay, they also have an "I" (ignition) terminal. The "I" terminal connects to the main power terminals when the relay is energized.
I figured replacing the relays would take 30-45 minutes, NOT. :-(
I had to change my control wiring that energizes the solenoids. With the old relays, I supplied a ground to energize them. However, to energize the new relays requires supplying 12vdc to the "S" terminal. The Starter relays have one terminal for applying power "S" (start), and the "ground" is the mounting bracket. The old relays had a terminal for each side of the coil. (right >)
 As part of this "rewire" I also fixed my "pump indicator" LEDs. I used the "I" (ignition) terminal on the starter relays to send power to the LED. The LED indicator tells me which way the pump is running UP or DOWN.
ALSO - I added a seperate return (ground) wire for the Hydraulic pump. I was using my main "12Vdc buss return", but I was seeing a voltage drop across the return wire of up to 1 volt when the pump was under load (40 amps). The new seperate return wire goes from the pump directly to the battery and shows about 25 -30 millivolt drop when the pump is under full load.
The bottom line, the pump runs much better with more power, and the relays pull in and out with no problems.
NOTE: The original relays I used were purchased surplus (This may have been the problem). They were mounted sideways. I bet if they were mounted vertical (as shown in the photo), they would have worked OK.
Waiter
As part of this "rewire" I also fixed my "pump indicator" LEDs. I used the "I" (ignition) terminal on the starter relays to send power to the LED. The LED indicator tells me which way the pump is running UP or DOWN.
ALSO - I added a seperate return (ground) wire for the Hydraulic pump. I was using my main "12Vdc buss return", but I was seeing a voltage drop across the return wire of up to 1 volt when the pump was under load (40 amps). The new seperate return wire goes from the pump directly to the battery and shows about 25 -30 millivolt drop when the pump is under full load.
The bottom line, the pump runs much better with more power, and the relays pull in and out with no problems.
NOTE: The original relays I used were purchased surplus (This may have been the problem). They were mounted sideways. I bet if they were mounted vertical (as shown in the photo), they would have worked OK.
Waiter
3 MAR 2007. Pumps and Gear Doors.
Hydraulic Pump Sump Pan
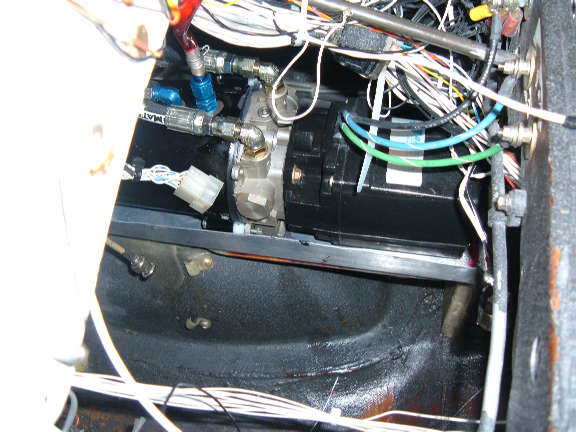
 I was able to weld the seams of the pan and also installed an AN4 connector in the bottom. I then re-installed the pump and the pan in the nose. I should have all the leaks fixed in the pump, but now if anything leaks, i.e. servicing, it will drip into the pan and NOT onto the floor of the plane. The pan drains through a tube in the belly of the plane.
Grasscutter gear door
This is the right door. I need to do the left door, but I still have a hydraulic leak on the left strut. I need to get a set of o-rings from JD at Infinity Aerospace and replace all the o-rings in the left strut.
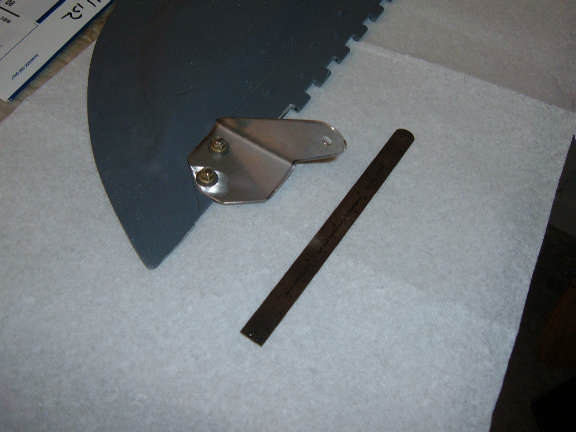
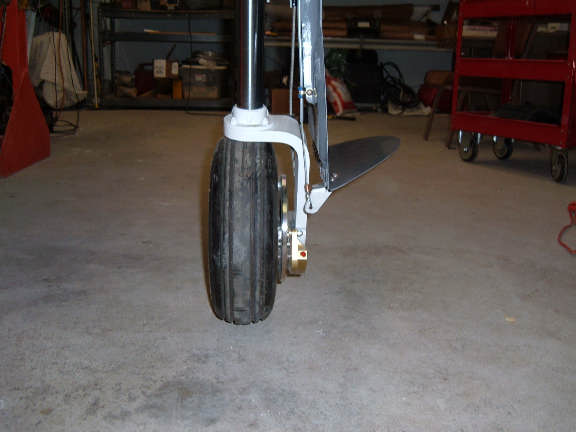
 1) I mounted the stainless bracket to the grasscutter door. The geometery is correct to achieve full travel (open/closed) when the gear is extended/retracted.
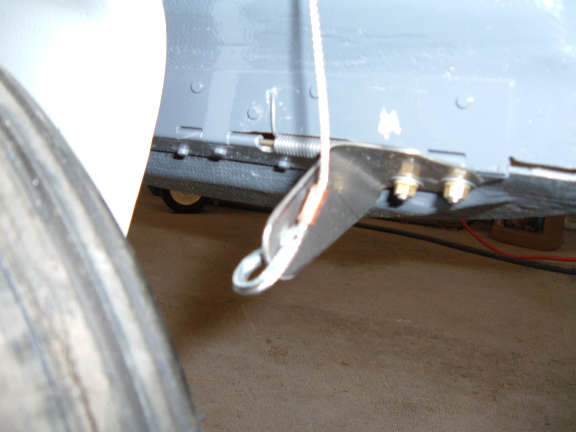
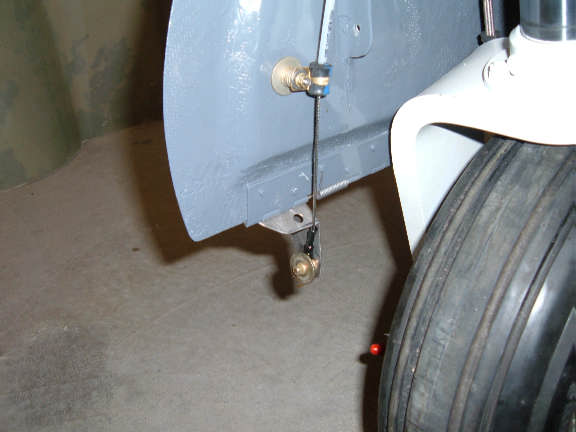
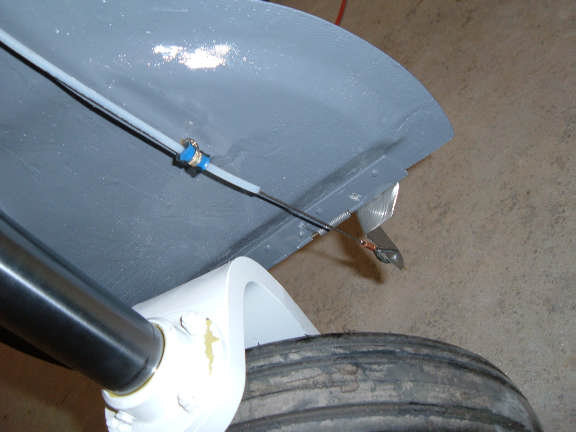
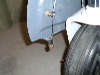
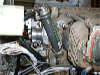
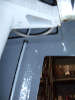
2) A 1/16 inch stainless cable is routed through Nylaflow tubing. As can be seen in Photo 2, a thimble connects the cable to the stainless bracket on the grasscutter door. The bottom of the Nylaflow tubing is secured to a reinforcement tab on the Main gear door with a -BR3 clamp.
3) The Nylaflow tube is then routed up the gear leg, Nylon wire ties secure the Nylaflow tube to one of the door mount posts.
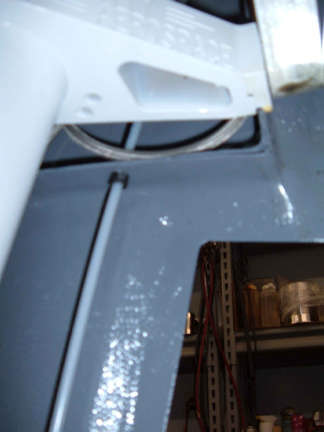
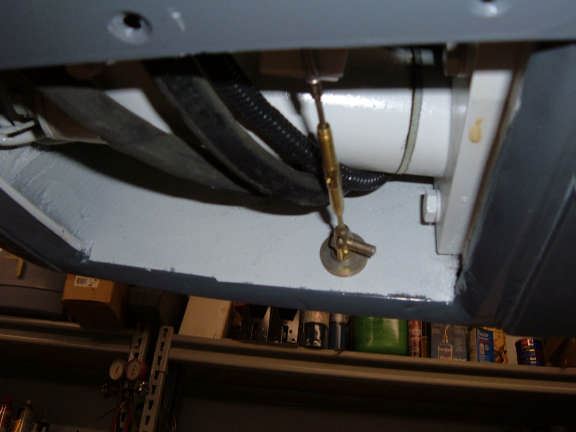
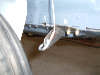
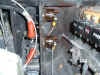
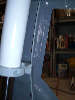
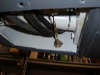
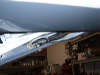
4) The Nylaflow tube continues up the gear leg and through a stress relief thimble in the bottom of the Brake Hose retaining area.
5) The Nylaflow passes through the Brake Hose retaining area (The brake hose can be seen coiled around the bottom of the area)
1) I mounted the stainless bracket to the grasscutter door. The geometery is correct to achieve full travel (open/closed) when the gear is extended/retracted.
2) A 1/16 inch stainless cable is routed through Nylaflow tubing. As can be seen in Photo 2, a thimble connects the cable to the stainless bracket on the grasscutter door. The bottom of the Nylaflow tubing is secured to a reinforcement tab on the Main gear door with a -BR3 clamp.
3) The Nylaflow tube is then routed up the gear leg, Nylon wire ties secure the Nylaflow tube to one of the door mount posts.
4) The Nylaflow tube continues up the gear leg and through a stress relief thimble in the bottom of the Brake Hose retaining area.
5) The Nylaflow passes through the Brake Hose retaining area (The brake hose can be seen coiled around the bottom of the area)
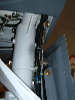
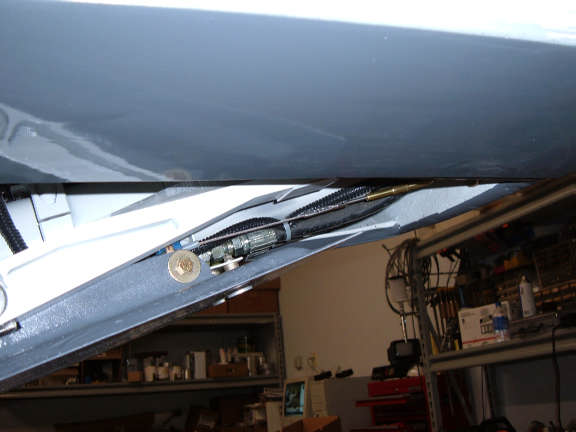
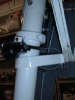
 6 and 7) The top of the Nylaflow tube is secured to one of the reinforcement brackets on the Main gear door using a BR-3 clamp.
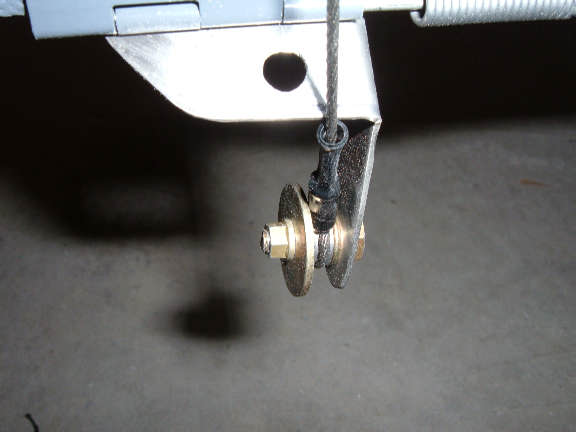
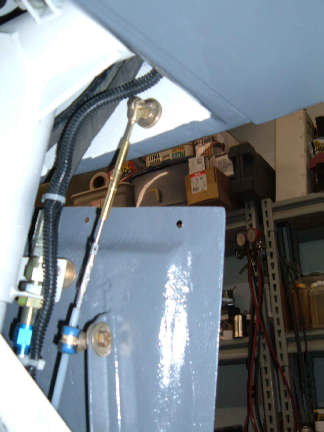
The Stainless cable that is inside the Nylaflow tubing is terminated in a turnbuckle. The top of the turnbuckle is attached to an eye bolt that is mounted to the outer strake bulkhead with a pin. The Turnbuckle is adjusted so that the grasscutter door is properly closed when the gear is retracted.
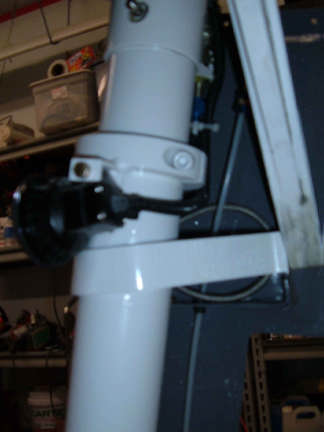
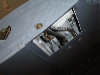
8 and 9) These two photos show the turnbuckle attach point when the gear is retracted. Once the turnbuckle is properly adjusted, it is safety wired.
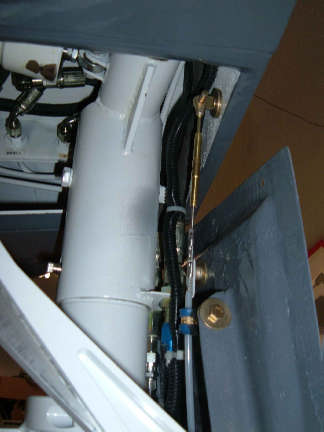
ALSO, note that the turnbuckle passes very close to the main gear scissor arm. I placed a small self adhesive teflon pad on the arm so the turnbuckle won't hit it.
6 and 7) The top of the Nylaflow tube is secured to one of the reinforcement brackets on the Main gear door using a BR-3 clamp.
The Stainless cable that is inside the Nylaflow tubing is terminated in a turnbuckle. The top of the turnbuckle is attached to an eye bolt that is mounted to the outer strake bulkhead with a pin. The Turnbuckle is adjusted so that the grasscutter door is properly closed when the gear is retracted.
8 and 9) These two photos show the turnbuckle attach point when the gear is retracted. Once the turnbuckle is properly adjusted, it is safety wired.
ALSO, note that the turnbuckle passes very close to the main gear scissor arm. I placed a small self adhesive teflon pad on the arm so the turnbuckle won't hit it.
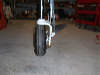
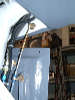
 10) This photo shows the gear fully extended, You can see how the Grasscutter door is open.
11 and 12) These two photos show the gear almost fully retracted, you can see how the cable is routed so it allows the grasscutter door to close.
10) This photo shows the gear fully extended, You can see how the Grasscutter door is open.
11 and 12) These two photos show the gear almost fully retracted, you can see how the cable is routed so it allows the grasscutter door to close.
*****************************************************************************************************
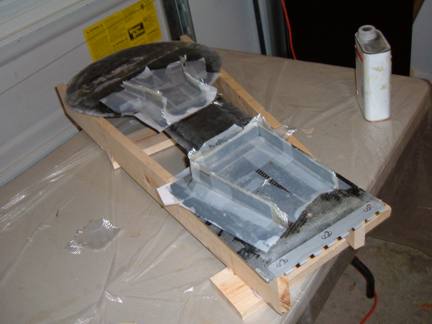
This is an earlier photo from May 2006. I added reinforcement tabs to the inside of the gear door in the area that covers the tire. I also added tabs at the top to form the "Brake Hose Retaining Area".
The tabs are made by first laying up two layers of BID on a flat surface with peel ply on both sides. When cured, the "tabs" are then cut out with a pair of scissors, then Super Glued into position on the gear door. Three layers of BID are then applied to each side of the tabs to give them their strength and thickness.
1 MAR 2007. New Web Server!
I transitioned to a new web server last night. I've only seen a couple minor problems and it looks like I got them fixed.
I've been slowly outgrowing my old server and had to be carefull of bandwidth, especially since I added videos. With the new server, bandwidth shouldn't be a problem.
My Host is still Ace-Host. If your thinking of starting a web site, I strongly recommend them. Click on their banner on the left side of the page.
Waiters GPS Set Time program.
Waiters Flight Data Recorder.
Flight Data Recorder.
Recording aircraft flight data.
Aircraft Voice recorder.
Garmin GPS.
Garmin GPS Serial data Format.
Recording EFIS data.
Capture Serial data.
Convert Raw Data Files.
Free GPS Software.
Reading GPS data.
Reading Garmin GPS data.
Aircraft EFIS Flight Instruments.
Electronic Flight Instruments.
Aircraft Engine Monitor System.
Garmin G format.
Infinity landing gear LongEZ Plans Built Airplane.
Oil Heat system for Homebuilt airplane.
LongEZ Canard and main Wing.
Dynon instrument panel.
Custom Mouse cursors.
Garmin Serial Data Format.
Easy, Free Computer Time setting by GPS Receiver.
Custom mouse pointers.
Custom airplane mouse pointers.
LongEZ Nose gear doors.
Long-EZ main landing gear doors.
LongEZ grasscutter landing gear door.
Custom LongEZ mouse pointers.
Lycoming engine in LongEZ.
MT Propellor with 6 inch propellor extension.
EZNose Lift retractable nose gear for Long-EZ.
Rutan LongEZ is a plans built aircraft.
High speed homebuilt airplane.
Retractable landing gear for LongEZ.
Custom Airbus mouse cursor pointer.
Custom Velocity mouse cursor pointer.
NMEA 0183 Serial data Format.
Custom Cozy mouse cursor pointer.
Custom Aerocanard airplane mouse cursor pointer.
Custom E-Racer mouse cursor pointer.
Custom Canard airplane mouse cursor pointer.
Custom LongEZ mouse cursor pointer.
Set your Computer clock with this free GPS software.
Custom F15 mouse cursor pointer.
Custom A10 Warthog mouse cursor pointer.
LongEZ Hydraulic pump.
Retractable landing gear for a Long-EZ.
Custom F16 mouse cursor pointer.
Custom F14 mouse cursor pointer.
Custom Boeing 747 mouse cursor pointer.
Custom Boeing 767 mouse cursor pointer.
Custom Boeing 777 mouse cursor pointer.
Custom Boeing 737 mouse cursor pointer.
GPS Time Sync.
Custom Boeing 727 mouse cursor pointer.
Landing gear door rigging.
Custom Boeing 757 mouse cursor pointer.
Custom MD80 mouse cursor pointer.
Custom DC9 mouse cursor pointer.
Setting your computer to a GPS Time.
Custom RV mouse cursor pointer.
Downdraft cooling for LongEZ.
Speed brake installation.
Waiters Flight Data Recorder.
LongEZ Baggage pods installation instructions.
Waiters Custom Airplane mouse cursors.
Free GPS Time Sync Program.
LongEZ Intercom installation.
Major airframe overhaul of plans built EZ.
Weight and balance for a LongEZ.
Weight and Balance spreadsheet download for a Long-EZ.
LongEZ fuel system design.
How To remove the wings from a LongEZ.
How To remove the canard from a LongEZ.
Waiters GPS Time sync program runs on PC.
How To remove the engine from a LongEZ.
Long-EZ Downdraft cooling for a Lycoming O-320.
Long-EZ Wing Removal and installation instructions.
Waiters Retractable Landing Gear Controller.
Landing Light installation in LongEZ.
Install free EFIS software on your PC.
How to Put several longezs in one hangar.
How to install an Infinity Aerospace Retractable landing gear in a Long-EZ.
How to install DownDraft cooling on a Long-EZ.
GPS Time.
Setting you computer clock to GPS time.
How to set your Computer clock to GPS Time.
Using your GPS Receiver to set your computers clock.
Low cost GPS receiver used to syncronize Computer clock to GPS time.
Neat Canopy stay system for an EZ.
Cabin Heat using engine oil as source.
Waiters GPS Time, Syncronize your PCs internal clock with the GPS satellite.
Remote display of EFIS on a PC.
Cabin Oil Heater for a LongEZ.
LongEZ Landing Gear Door.
Rigging a LongEZ Landing Gear door.
Icom Radio in LongEZ.
How to Build a Manometer.
LongEZ Electrical system upgrades.
Grand Rapids EMS.
Custom Windows cursors.
Custom Windows mouse pointers.
LongEZ Cowling for downdraft cooling.
Record holding LongEZ flights.
Using a PLC for a retractable Landing Gear Controller in a LongEZ.
Syncronize your PCs clock to a GPS receiver.
Airspeed vs pressure lookup tables.
How to build a homebuilt airplane.
Video of LongEZ taking off.
Grasscutter landing gear door.
EZ Nose Lift installation.
Landing Gear status indicator.
Shareware software can set your PC clock vie a GPS receiver.
Landing Gear controller computer for LongEZ.
Landing gear doors.
Dynon EMS10 installed in instrument panel of a LongEZ.
Dynon EFIS D10A installed in instrument panel of a LongEZ.
Flight Data Recorder Software.
PlansBuilt LongEZ.
Video of High G turn in a Long EZ.
Strong Pitch Trim system installed in a LongEZ.
Strong Pitch Trim mounted on Left Side of Long-EZ.
Free software sets your PC clock with a GPS receiver.
Video of LongEZ Taking off.
Video of LongEZ Landing.
Video of LongEZ performing a high G turn.
Video of Infinity Landing gear being retracted into a LongEZ.
LongEZ Color White.
Painting your LongEZ.
White LongEZ.
Camoflage LongEZ.
Infinity Landing Gear for LongEZ.
Strong Pitch system.
|