|
|
I just moved the web site to a new server.
If you have any problems with pages or downloads,
let me know, Fly safe, Waiter
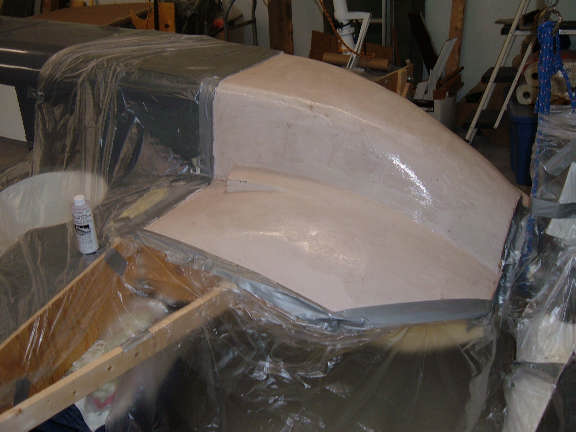
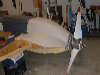
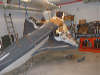
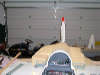
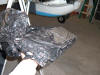
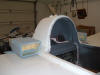
31 Dec 2006. LongEZ Cowling, Continued
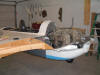
The LongEZ is again flipped over right side up. I'll wait until I'm finished with the top before I try and pop the bottom cowl off the mold.
NOTE: I used spray foam to fill in some large holes and gaps. This is the spray can stuff I bought at Home Depot. It's great for filling in gaps around windows and outlets, but it ain't worth a darn for this kind of work.
When the foam cures, it has the texture and consistancy of a dish sponge, kind of springy, not good for carving. I'll stick with the two part foam in the future.
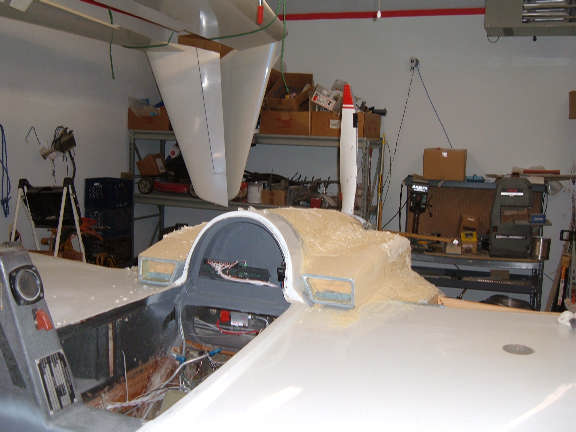
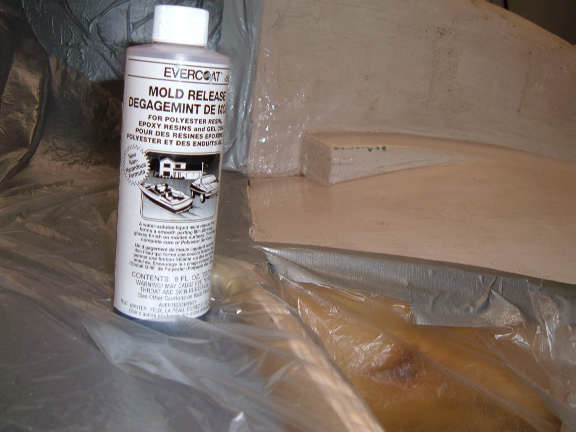
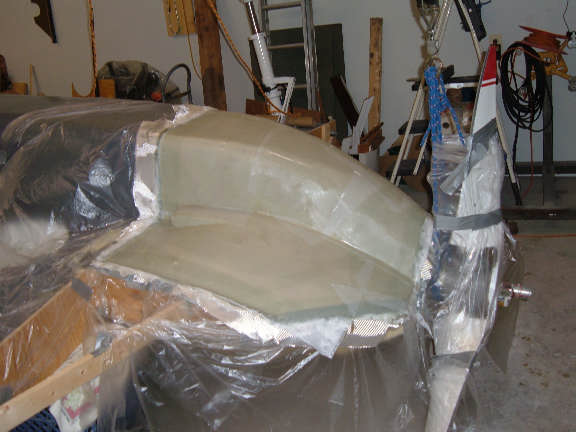
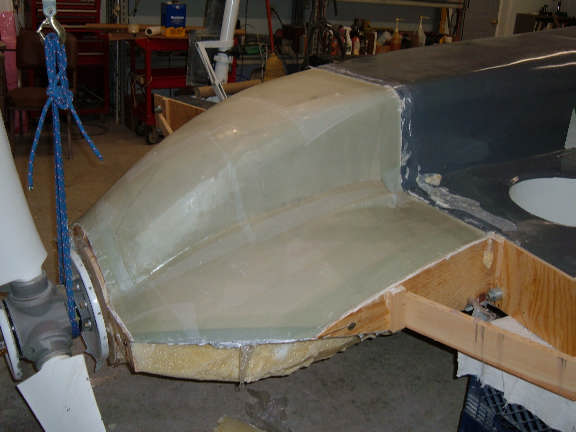
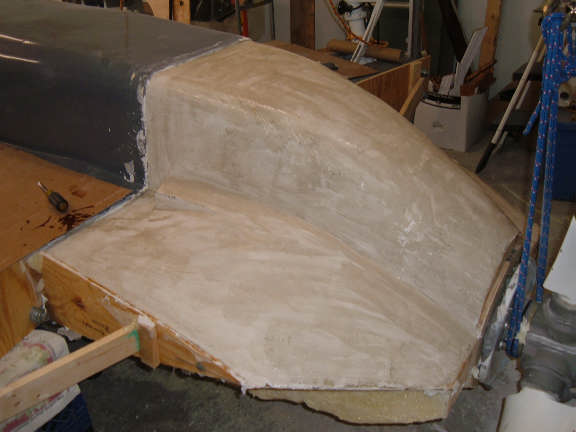
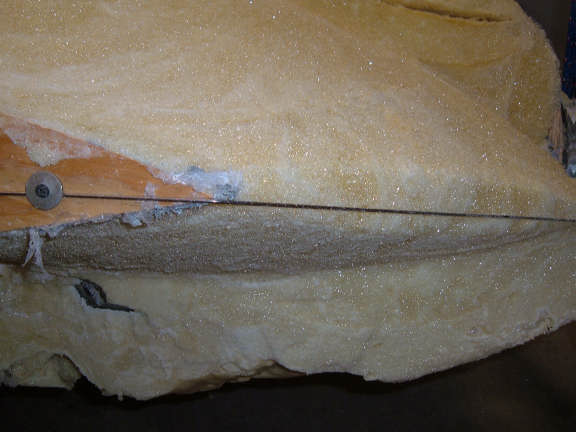
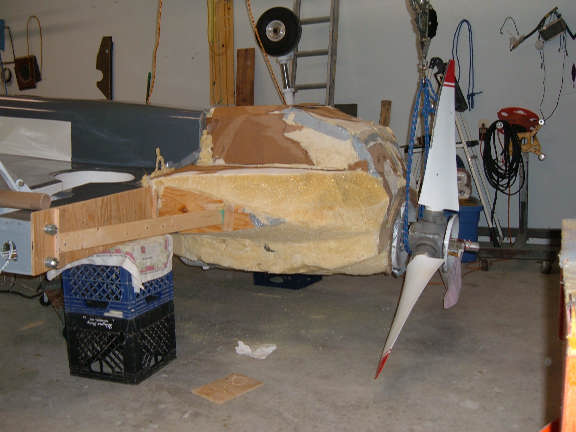
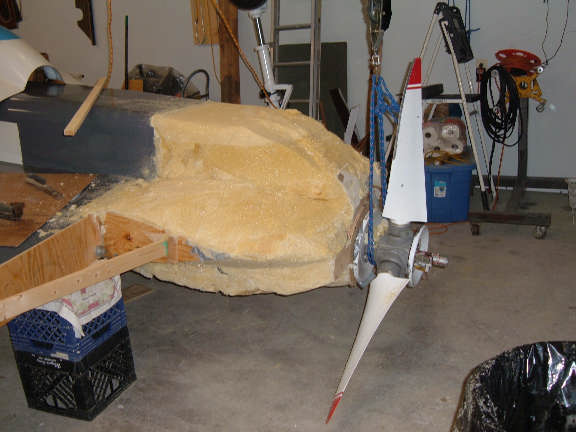
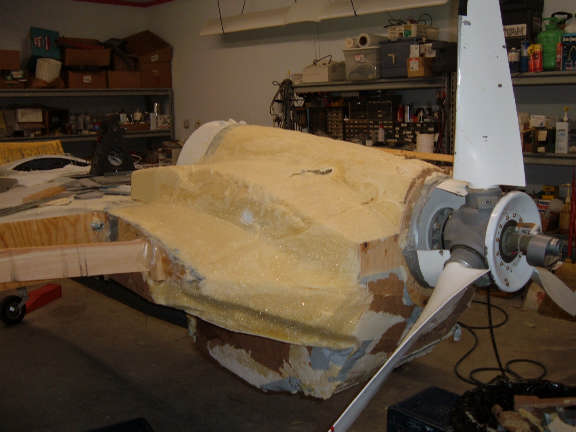
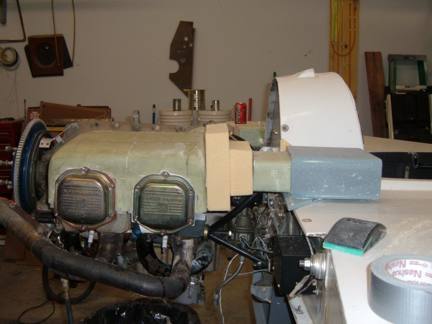
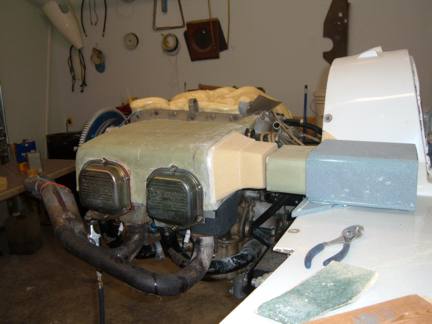
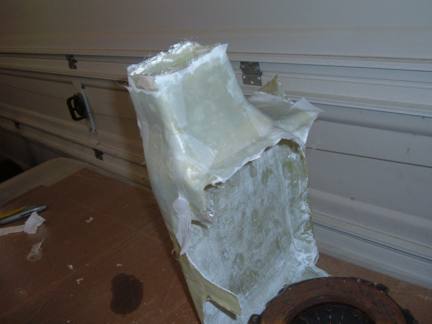
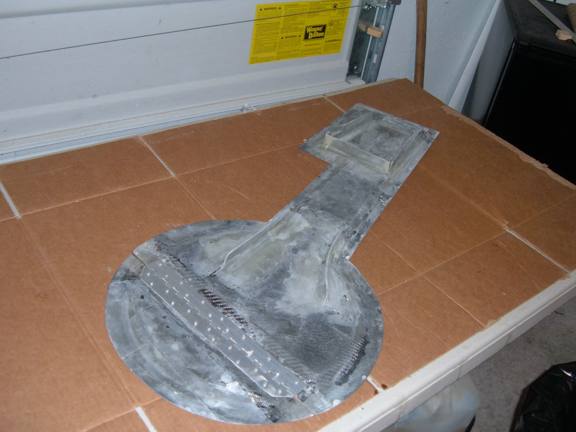
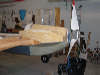
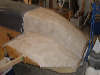
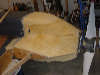
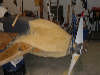
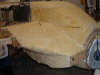
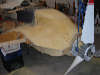
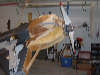
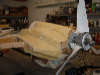
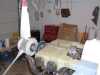
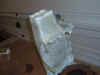
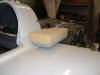
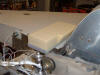
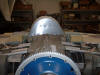
29 Dec 2006. LongEZ Bottom Cowl Complete (almost)
I say ALMOST, because there is still a lot to do, but the basic shell is now complete.
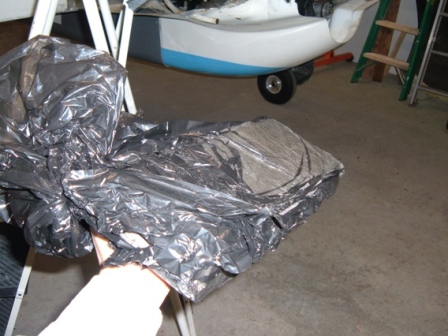
The cowl area is again taped off with duct tape and plastic. I used Evercoat mold release painted on with a brush, letting it dry for a couple hours before starting the glass layups.
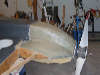
This is four layers of BID. I also put down 2 inch BID tapes all the way around. There is a peel ply layer both inside and outside.
Although the basic "shell" is now complete, there is still a lot of work to do. The mounting tab lips need to be installed,
all fastners need to be installed, ductwork needs to be installed, and a stiffner needs to be installed.
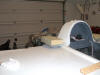
28 Dec 2006. LongEZ Cowling, Continued
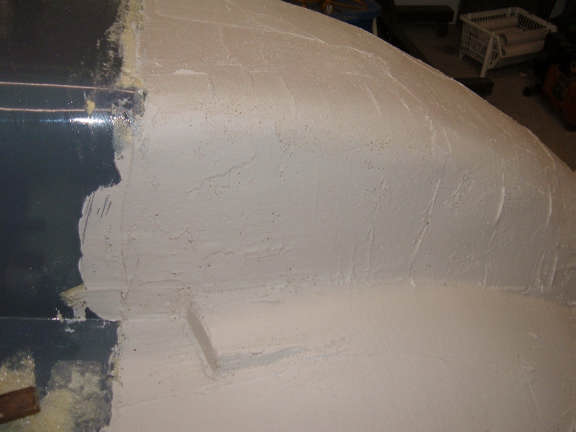
1) It takes several iterations of sand and fill, but it goes quickly. The 20 minute mud is cured and ready to sand in a couple hours
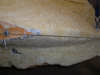
2) The photo isn't very good, but what I am showing is the mold does NOT line up with the fuselage. In order to account for the thickness of the completed cowling,
I made the mold about 1/8 inch smaller all the way around.
When I do the glass layups, the outer skin of the cowl should line up nicely with the fuselage.
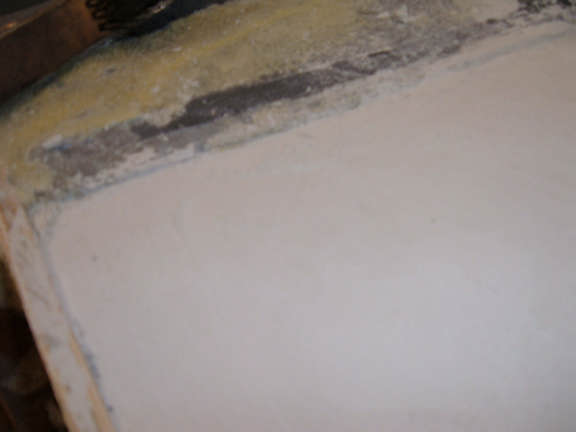
3) This is the first of three coats of Lacquer. The lacquer binds the mud together and also fills in those microscopic knocks and crannys. The lacquer also provides a nice surface for the release agent to stick to.
The release agent is applied to the mold just prior to laying up the glass
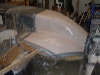
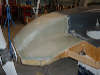
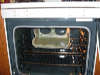
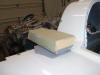
27 Dec 2006. LongEZ Cowling, Continued
1) The basic shape is now carved.
2) I used 20 minute sheet rock mud to do the first coating.
3) A close up. You can see some of the imperfections in the mud, these will be cleaned up on the second/third coat. Note the small intake scoop. This will be used for combustion air intake.
An identical scoop on the other side is used for air to the oil cooler.
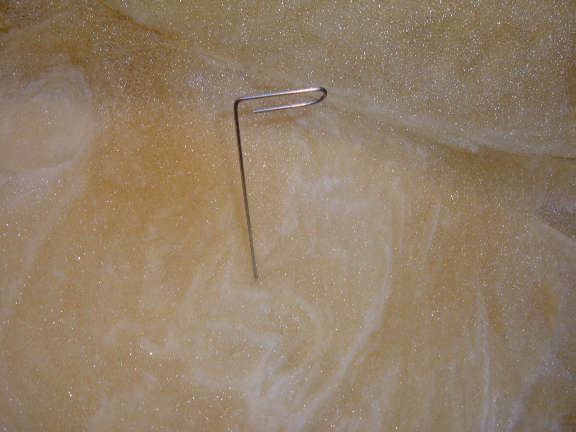
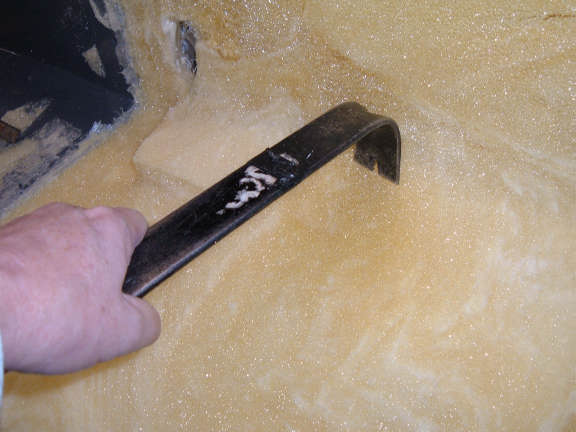
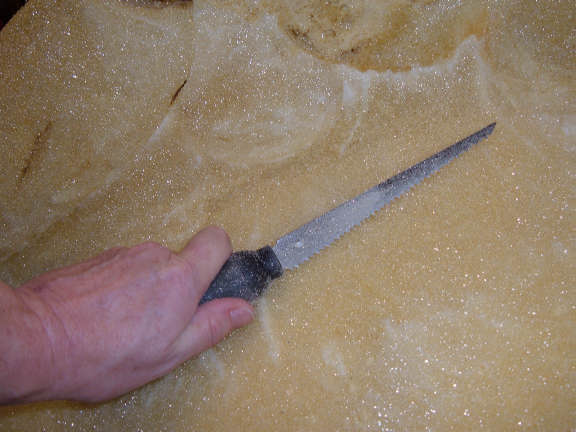
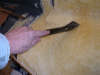
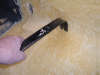
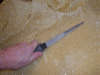
Carving Tools
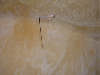
1) Unfortunantly, clear foam doesn't exist! So, I took a lot of photos before I started, This was done so I would know where everything was when I started carving.
A short steel rod (cloths hanger) makes a good probe for finding things like exhaust pipes, alternators,etc, through the foam.
2 and 3) This nailpuller / prybar made an excellent chissle/scrapper. It can remove a lot of foam in just one swipe or push
4) This is a hand saw used to cut/trim sheet rock. It works great for sawing foam, AND it can also be used like a very course file. Grab the handle with one hand and the tip with the other, pull the saw across the foam at a 45 deg angle.
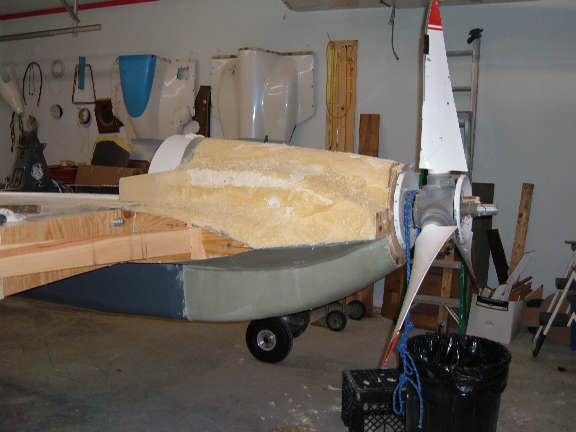
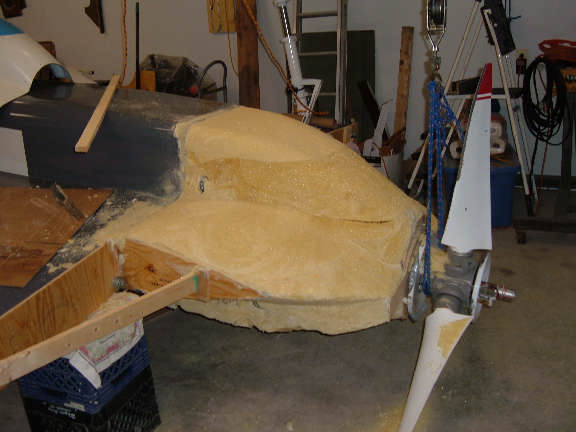
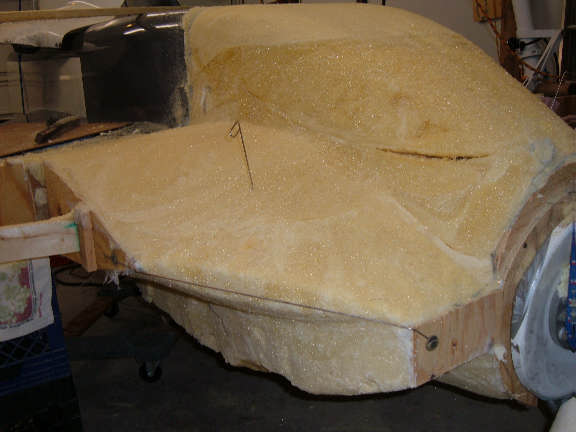
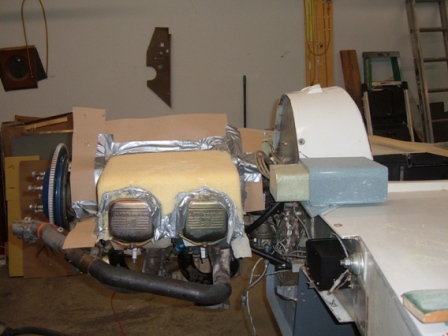
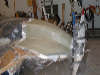
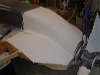
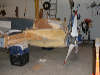
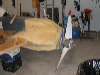
26 Dec 2006 - Carving Bottom Engine Cowling
1) The bottom cowl is starting to take shape.
2 and 3) A trick to getting a nice straight line where the trailing edge will be!. I used a stiff piece of wire between the wing trailing edge and the cowling air exit box (a cloths hanger might work).
Trim the foam and use this wire as a guide.
4) The bottom cowl is almost ready for a coating of sheet rock mud.
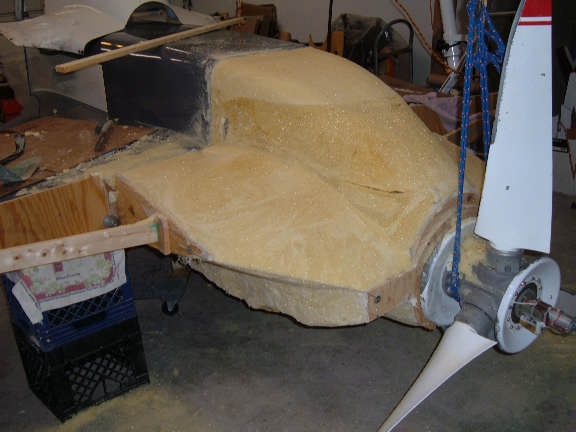
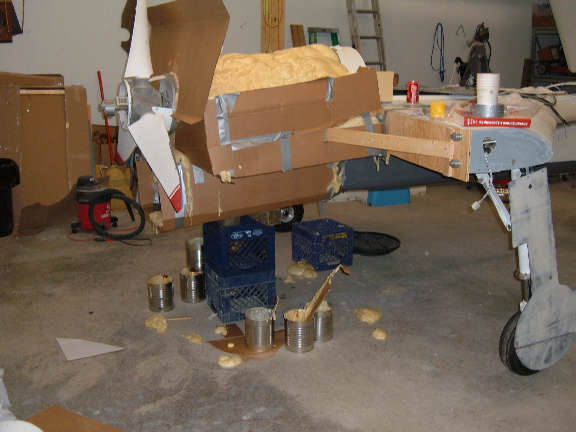
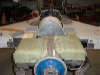
25 Dec 2006 - MERRY CHRISTMAS - Carving Engine Cowling
Rolling the LongEZ over with the engine and propellor attached was a little more difficult, This is because the weight of the engine and prop easily doubles the weight of the fuselage assembly.
The only real difficulity I had was the rear lifting sling was adjusted to long and I couldn't raise the fuselage high enough, I was short about two inches.
I had to use a floor jack to raise the plane another two inches so I could swivel it.
Once I had the LongEZ securly on its back, I was able to start carving. I only worked a couple hours, and was able to spend the rest of the day celebrating Christmas with family and friends.
Its starting to look like a cowling!! :-)
24 Dec 2006 - Engine Cowling - Carving Foam on Christmas Eve
This is the time consuming part, carving away foam to get a nice pleasing and aerodynamic shape!
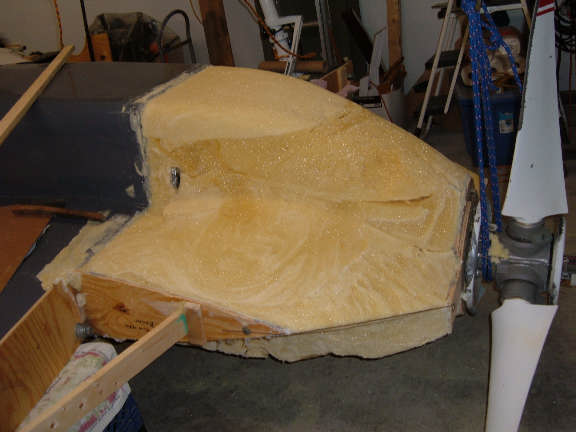
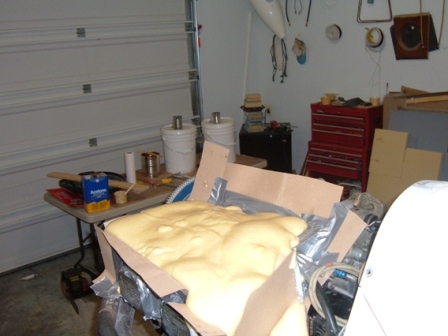
23 Dec 2006 - Engine Cowling - Foam plug

Basically, we are going to make a mold, then lay up the glass on the mold. SOUNDs EZ.
Notice I made an "exit" template out of plywood. The "exit" will be the openings in the back of the cowl.
This plywood template is very important as it is used as a guide when carving the foam.
The template is held in place on the front of the spinner with several pieces of safety wire.
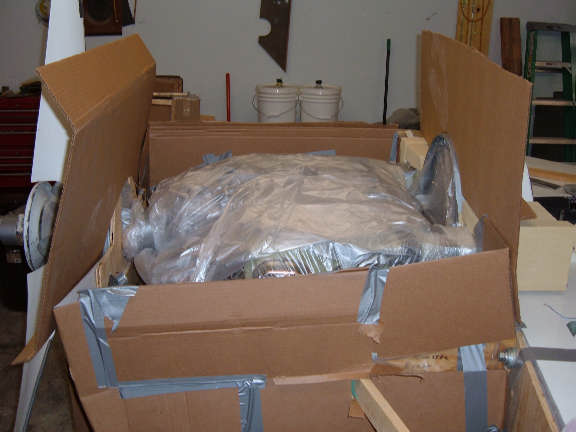
1) wrap the engine in plastic, and make a box out of cardboard. Cover everthing inside the box that we don't want foam to stick to.
2) Fill the box with two part foam. I mixed the foam in old one gallon cans that I scrounged from work.
HINT: Wait until the foam just starts to expand before dumping it into the box.
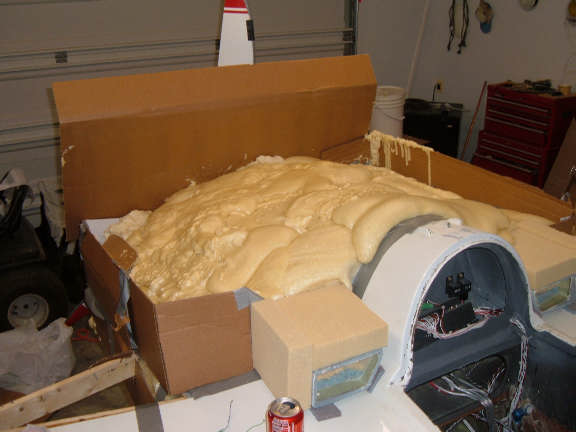
3) Wait 24 hours for the foam to cure and is ready to start carving.
This process took the better part of one day. I used 15x two part expanding foam, PART A and PART B each came in a 5 gallon pail. These were purchased from US Composites.
EDIT: I think if I were going to do this again, the 20x (3 lb) would be a better choice.
20 Dec 2006 - Fiberglass Cooling Plenums
I cleaned up the left plenum a little and dropped it into place. I really like what I'm seeing.
A nice tight fit of the entire air plenum system, with air intakes that are properly sized (11 sq inches per side) for the required cooling.
The BIG question, "Will it hold up to engine operating temperatures"? I've given this a lot of thought before I committed to doing it this way.
The initial concern is, can the glass plenum survive a worst case, HOT CHT. i.e 550 Deg F
I believe the answer is YES. Here's how I came to this conclusion:
While flying, the plenum is exposed to high velocity cooling air, so its surface will be at the same temperature as the cooling air,
EXCEPT were a plenum surface actually is in contact with metal engine surfaces.
SO, the next question, what are the temperatures of the engine surfaces that are in contact with the plenum?
The highest temperatures that the plenum would be exposed to are the places that the plenum glass touches the engine; i.e.
cylinder top (valve cover area), fin sides, and the crankcase. Because cold air is flowing through the fins where the plenium touches
the cylinder sides, I'm guessing that the temperature at the point of contact (the point where the glass plenum is touching the fin)
is probably only 50 - 100 Deg above the air temperature, i.e. 200 Deg F.
I anticipate that the hottest contact point will actually be where the plenum touches the crankcase. I'm guessing that this part of
the crankcase (up around the cam) may get to 250 or 300 Def F.
There is a lot of oil splashing around up in this area, so the oil is acting as a heat sink.
When looking at these numbers, the highest temperature the plenum would be exposed to would be 300 Deg. Well within the maximum 400 Deg that the glass will take.
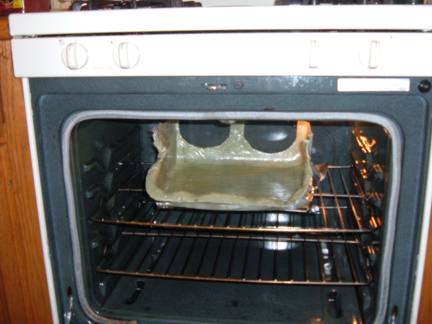
To ensure the plenums are thermally stable (they won't soften/sag), they are post cured at 400 Deg F for an hour (My wifes baking oven). This is the upper limit of the epoxy.
CHTs should NEVER go above 500. This temperature is read at the probe boss next to the exhaust port.
The area immediatly surrounding the exhaust valve port is the hottest temperature anywhere on the cylinder.
If CHTs are above this, Cylinder damage can be expected
"Normal Operation" depends on the engine receiving an ample supply of cooling air.
The only time this could be a problem would be prolonged engine operation during ground operations.
I don't think this is an issue, as I normally keep an eye on CHTs while on the ground.
I can't recall ever making a decision to shut an engine down during ground operations because I was concerned about heat.
HOWEVER, I will most likely placard the engine CHTs not to exceed 350 Deg F during ground operations
THINGS LEFT TO DO
The plenums need to be sanded, primed, and painted. I'll probably paint them white inside and out so they won't absorb any radiated thermal energy from the engine.
I also need to reroute the OIL FILLER TUBE. My thoughts on this are: The original tube will need to have a 45 deg bend in it to bring it strainght up.
This precludes the use of the existing "dip stick", as its really an aluminum rod that doesn't bend. I'm thinking about using an automotive type dipstick (the flexible ribbon of steel).
I'll keep the existing Lycoming screw on cap (without the dip stick attached).
I'll most likely make a small storage tube compartment and keep automotive style dip stick in there.
When I want to check the oil, I'll need to remove the cap, pull the dip stick out of its storage tube and insert it into the fuiller tube, check the oil, then place the dip stick back in its storage tube
20 Dec 2006 - GETTING READY TO POUR FOAM
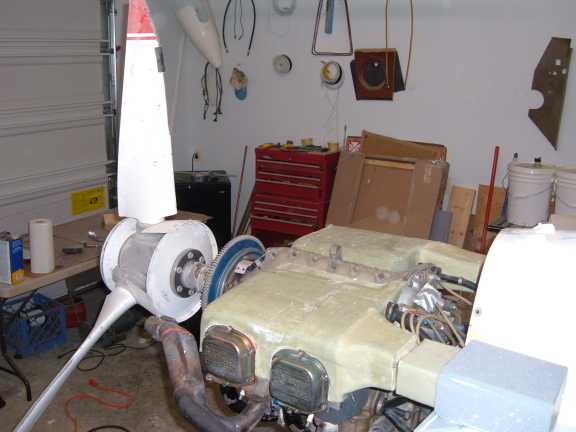
The next big step is to carve the custom made cowlings. Over the last 15 years I've looked at many different variations.
I'm going to attempt to take the best of all of these and make a nice clean aerodynamic cowling.
SO, The MT Propeller is back on and the plenums are in place. The next step:
a) wrap the engine compartment in plastic
b) Duct tape/plastic everything so the foam won't stick to it
c) Reinstall my fake wings
d) Attach the cowling fiberglass flange/lip to the fuselage (these form the lip attachment for the cowling to fuselage junction)
e) make "foam dams" around the engine compartment using cardboard
f) mix and pour the two part foam
g) When cured, carve/cut any foam that doesn't look like a cowling! :-)
Sure sounds EZ, doesn't it.
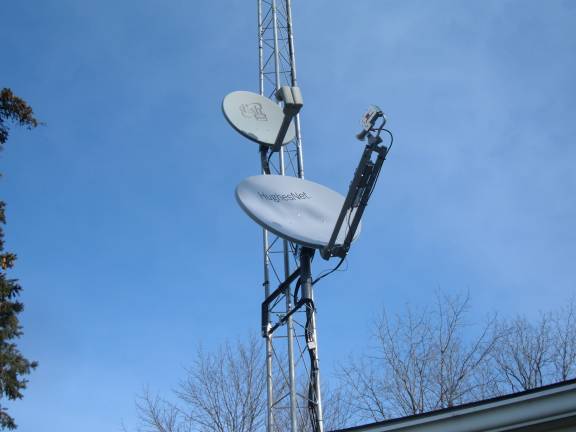
19 Dec 2006 - NEW ISP - WEB CAM BACK IN OPERATION
ALRIGHT, I have Broadband service again. The HughesNet
system was installed a couple days ago, and I just now got all the linkage
updated from my web site at
Ace-Host. It costs a little more than I would like to have spent, but
its the only way to get broadband service when you live out in the sticks.
Of course, the real good news is, the WatchWaiterWork Web Cam works again, with
almost real time images :-)
The first time you use the WatchWaiterWork web cam, you'll probably be asked if
its OK to install an ActiveX component from AXIS.
Click OK, You need this component in order to view the web cam. It should
download pretty fast if you are on broadband.

Getting the HughesNet system to work
with my existing AXIS cameras and
Smoothwall firewall was a test of my patience and research abilities,
but I was finally able to get everything to work together. I posted a brief on
the Smoothwall website forum on how to
get the HughesNet system to work through
a Smoothwall firewall.
Images are real time, but remember, there is about a 2 second delay for transit
times to and from the HughesNet satellite.
17 Dec 2006 - Left Side Cooling Plenum

1) I post cured the glassed plenum in the oven. 300 Deg for about 30 minutes.
After I glass the duct section to the front of the plenum, I'll post cure the
entire assembly again at 400 Deg F for about 45 minutes. The Plenum should
never see a temperature this high, even if the CHT is running 500 Deg F.
2) Urethane blocks micro'ed onto the front of the plenum. These are then carved
and glassed to match the intake duct work.
3) Both plenums temporarily installed. The left plenum still needs the duct to
be carved and glassed
4) The left plenum duct has been carved and glassed. When cured, I'll clean up
the glasswork, dig out the foam used for the duct mold, And post cure the
entire assembly at 400 Deg F for 45 minutes.
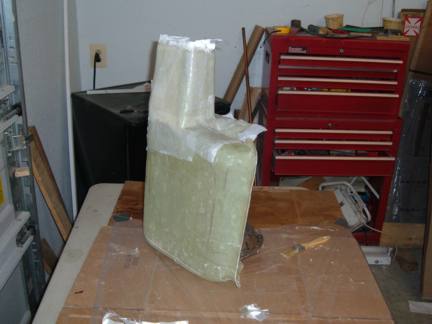
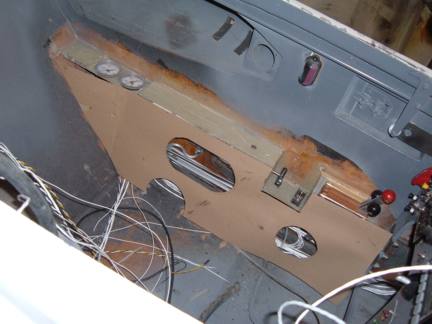
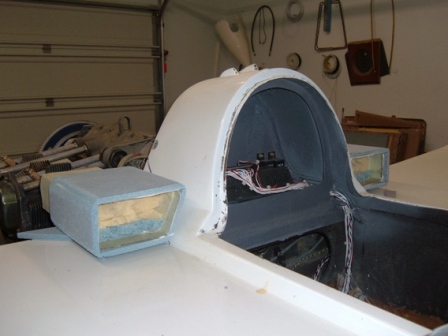
16 Dec 2006 - Left Side armrest console


1) A cardboard mockup of the left armrest support. There are two access
cutouts (covers will be installed over them). The oval shaped cutout provides
access to the CO2 bottle used for emergency gear extension of the
Infinity Gear . The round cutout provides access to the
Aircraft Spruce throttle quadrant linkage.
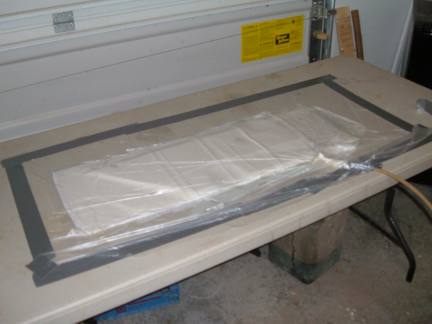
2) The armrest support gets two layers of BID on one side, and four on the
other. Its then put under vacuum to compress the glass and remove excess epoxy.
The layup schedule is fairly "BEEFY" as this bulkhead supports the entire
weight of the pilot when getting in and out of the plane. I wanted to ensure
its strength, mainly because of the large cutout for the CO2 bottle access.
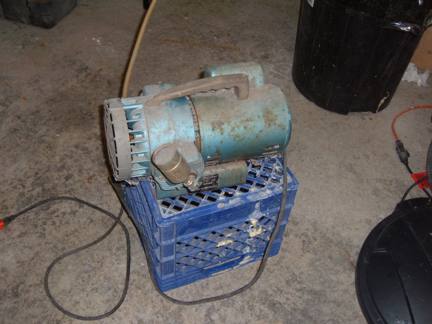
3) This is an old vacuum pump I bought at a garage sale. Works great,
especially for the Cozy Girrrls LOW-VAC
method.
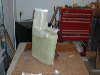
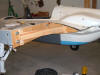
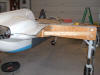
11 Dec 2006 - Add air duct to cooling plenum


1) With the plenum basically finished, I glued urethane foam to the front.
2) I then carved the shape to line up with the intake.
3) 4 layers of BID all the way around. When its cured, I'll cut out the foam
and cut open the duct to the plenum.
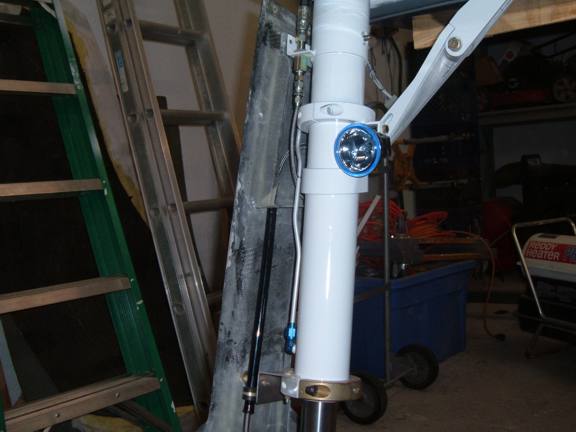
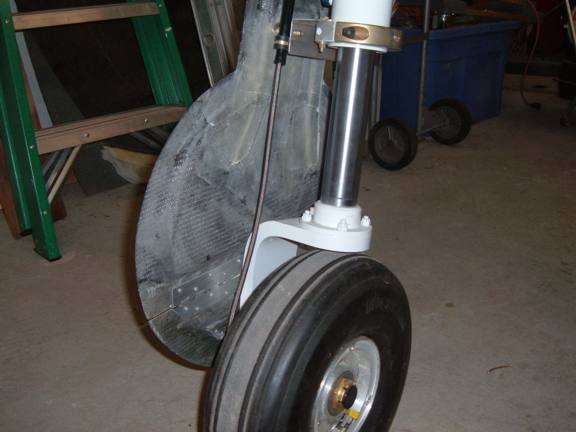
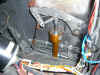
10 Dec 2006 - Main Gear Brake Lines
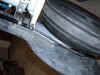
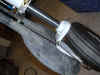
Photo 1 shows the strut retracted. Photo 2 shows the strut extended.
I drilled and tapped a hole in the axel bracket (10x32). This clamp holds the
hose and lines it up with the guide tube.
A thought came to me after I was finished with this, I may go back and redo it.
Before installing the connector on the brake end of the hose, slide the hose
into a tight fitting aluminum tube about 14 to 16 inches long. Make it so that
this Aluminum tube slides up into the guide tube. Secure the bottom of the
Aluminum tube at the top of the axel brace. The aluminum tube will slide into
and out of the guide tube as the strut compresses. The aluminum tube will be a
lot stiffer than just the hose along.
9 DEC 2006 - WATCH WAITER WORK Camera
I temporarly pulled the Web Camera out of service. My ISP,MetaLink,
has been experiencing extreemly slow UPLINK speeds. This was a wireless system,
I just happen to be way out on the very end of their coverage area. I order
HughesNet Satellite, Hopefully this will solve my speed problem. They
are supposed to have it installed next week.
8 DEC 2006 - WEB SITE UPDATES
I'm sure you noticed a new look. I'm in the process of updating the web site
These updates will speed up load times and make navigation a lot smoother. I'm
catching most of the bad hyperlinks as I go. If you can't find something
because of a missing or bad hyperlink, drop me a line and I'll fix it.
5 DEC 2006 - DOWNLOAD DIFFICULTIES ???
There have been several reports of problems downloading files from this site.
It doesn't happen all the time, but seems to be more prevalient with those
going through a firewall and having somewhat intermittent connectivity (timing
issues?)
Goto DOWNLOAD PROBLEMS. I think one of these
two recommendations will get you the file your trying to download.
If you have any questions, observations, bugs, whatever,
contact me.

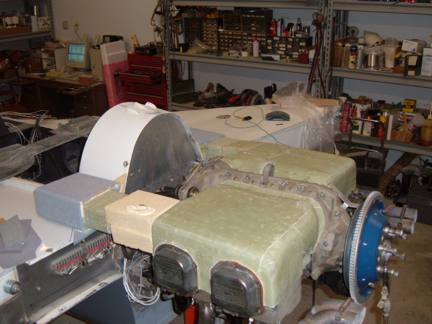
2 DEC 2006 - Cylinder Plenum
I decided to do the plenums out of fiberglass. These will be ducted to the
intakes with a short section of flexible hose.


1) The cylinder area is prepared and I study the layout so I know what foam to
cut.
2) The cylinders are filled with 2 part foam and its allowed to cure for about
1 hour. I'm using a two part foam that expands to 15x its original volumn. I
purchased this in 5 gallon pales from US
Composites. These guys are a good source for composit materials.
3 & 4) The foam is carved so I can get a good seal all around both
cylinders. Note that after the form is glassed and cured, there will be a short
air intake duct section added to the front of the plenum. The short duct
section will line up with the strake duct, and will be glassed to the plenum.
5) The foam is coated with sheet rock mud to smooth it out and fill in some of
the imperfections. This is also a learning experience, as this is the same
exact way I will be building the cowling.
25 NOV 2006 - DOWNDRAFT INTAKES.
I'm probably doing this bas-ackwards, but I have no plan to go by, so this is
how its being done. The most complicated feature is the intakes. I probably
could have built the intake s into the upper cowling, but I decided to use this
approach. The intakes are permanently mounted on top of the strakes. Each
intake supplies air to its two cylinders and also there is an air port for
mag/ignition cooling. The cooling intakes are approximately 14 square inches
each. I pick off two square inches for mag cooling.
The cylinder cooling plenums are built into each side, and are supplied by a
short flexible hose from the intakes. More on this later.

These are the molds for the inside of the duct. This will be the openings that
air flows through. They measure approximately 5 1/2 by 2 1/2.
Three layers of BID were wrapped around the foam. They were then LO-VACed.
After about 30 minutes under LO-VAC, I put them in the oven to bake at 200 deg
for 1 hour.
I then cut 3/8 inch foam and used slurry to bond the foam to the duct. This now
forms the wall of the duct. The ducts are mounted with a slight inward angle so
the air passes directly to the cylinders. The outer skin of the ducts will be
tapered at the same time as the cowling so they will have a good form and fit.
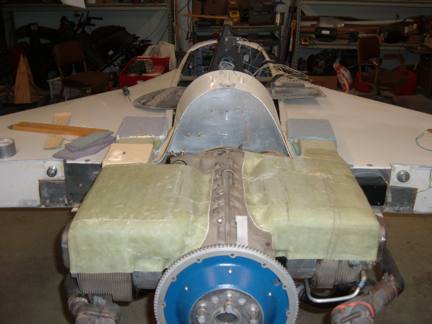
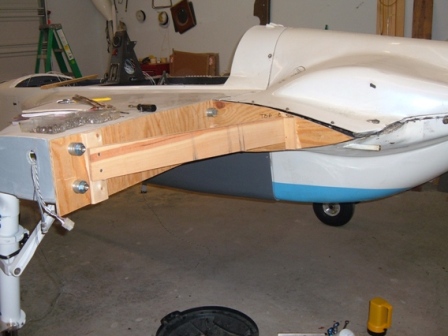
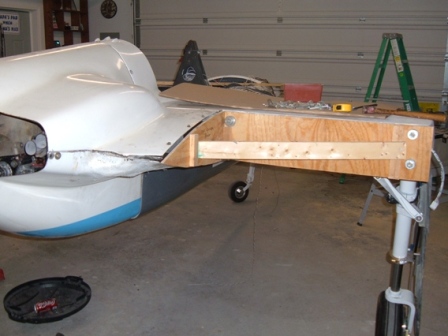
11 NOV 2006 - FAKE WINGS.
The Engine is back on temporarily so I can start on the cowling. I plan on
making my own cowling, as I want to incorporate several features into it. Of
course the main feature will be downdraft cooling. I also will be incorporating
an oil cooler inlet on the armpit, and ignition air on the right armpit. The
lower cowling will incorporate ductwork as an integral part of the cowling for
oil heat exhaust, and combustion air filtering and bypass.
So, in order to get a good fit on the cowling, I need to know where the wings
are and what their basic curvature is. In order to accomplish this, its either
hang the wings, or build "Wing Simulators".
I installed the old cowling and bolted the two halves together. This should
give me a good representation of where the wings are and their respective
geometry.
I then cut a couple pieces of plywood and secured them to the center spar. This
is the exact position and curvature of the wing.
I'll use these "fake Wings" when I start carving the cowling. When I'm
finished, I'll need to mount the real wings to get precise position to finish
the cowls.
4 NOV 2006 - Main Brakes and Gear Doors.
One of the challenges I'm faced with regarding the main gear, is, How to safely
and reliable ensure that the brake cable retracts, or positions itself so as
not to interfere with the door when it closes.
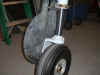
1) This is the gear door. I added two reinforcement lips where the small part
of the door expands out to where the tire goes. I also made a small "box" at
the top of the door.
2) This "box" will capture the coiled up brake line, and keep it from getting
caught up in any of the moving parts.
3) You can see the brake line coiled up within the box. NOTE: the box will be
lined with Teflon after the gear door is painted. This should eliminate any
abrasion from the brake line.
NOV 2006 - Airplane Work, At Last, Again
The last five months have seen a lot of activity, unfortunately, NONE of it has
been working on airplanes. May, June, and July were occupied with getting my
parents old house ready to rent out.
I helped my two daughters move to Arizona, So, A round trip from Ohio to
Arizona and Calif and back to Ohio covered 7,000 miles in 10 days.
Then came Fall harvest at the cannery. That went very smooth this year. Harvest
is long hours, 4am till 8 or 9 pm, 7 days a week for Aug, Sep, and most of
October.
I told my wife, "No more new projects until the EZ is back in the air". I'm now
into the third year of a rebuild that was only supposed to take 4 months.
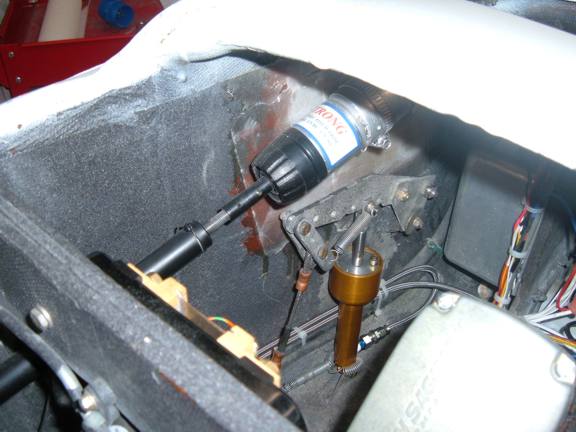
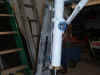
29 Oct 2006 - Front brake cylinders installed !!!!!!!!.
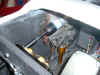
1 & 2) I used all the original hardware, brackets, etc. I originally
(1996) had the Cleveland Master cylinders, However, to get more braking power
(larger diameter cylinder bore) I changed to these. (That's the reason the top
bridge looks like it had a piece added to it. Note also the
Strong Pitch Trim drive assembly at the top of the photo.
Waiters GPS Set Time program.
Waiters Flight Data Recorder.
Flight Data Recorder.
Recording aircraft flight data.
Aircraft Voice recorder.
Garmin GPS.
Garmin GPS Serial data Format.
Recording EFIS data.
Capture Serial data.
Convert Raw Data Files.
Free GPS Software.
Reading GPS data.
Reading Garmin GPS data.
Aircraft EFIS Flight Instruments.
Electronic Flight Instruments.
Aircraft Engine Monitor System.
Garmin G format.
Infinity landing gear LongEZ Plans Built Airplane.
Oil Heat system for Homebuilt airplane.
LongEZ Canard and main Wing.
Dynon instrument panel.
Custom Mouse cursors.
Garmin Serial Data Format.
Easy, Free Computer Time setting by GPS Receiver.
Custom mouse pointers.
Custom airplane mouse pointers.
LongEZ Nose gear doors.
Long-EZ main landing gear doors.
LongEZ grasscutter landing gear door.
Custom LongEZ mouse pointers.
Lycoming engine in LongEZ.
MT Propellor with 6 inch propellor extension.
EZNose Lift retractable nose gear for Long-EZ.
Rutan LongEZ is a plans built aircraft.
High speed homebuilt airplane.
Retractable landing gear for LongEZ.
Custom Airbus mouse cursor pointer.
Custom Velocity mouse cursor pointer.
NMEA 0183 Serial data Format.
Custom Cozy mouse cursor pointer.
Custom Aerocanard airplane mouse cursor pointer.
Custom E-Racer mouse cursor pointer.
Custom Canard airplane mouse cursor pointer.
Custom LongEZ mouse cursor pointer.
Set your Computer clock with this free GPS software.
Custom F15 mouse cursor pointer.
Custom A10 Warthog mouse cursor pointer.
LongEZ Hydraulic pump.
Retractable landing gear for a Long-EZ.
Custom F16 mouse cursor pointer.
Custom F14 mouse cursor pointer.
Custom Boeing 747 mouse cursor pointer.
Custom Boeing 767 mouse cursor pointer.
Custom Boeing 777 mouse cursor pointer.
Custom Boeing 737 mouse cursor pointer.
GPS Time Sync.
Custom Boeing 727 mouse cursor pointer.
Landing gear door rigging.
Custom Boeing 757 mouse cursor pointer.
Custom MD80 mouse cursor pointer.
Custom DC9 mouse cursor pointer.
Setting your computer to a GPS Time.
Custom RV mouse cursor pointer.
Downdraft cooling for LongEZ.
Speed brake installation.
Waiters Flight Data Recorder.
LongEZ Baggage pods installation instructions.
Waiters Custom Airplane mouse cursors.
Free GPS Time Sync Program.
LongEZ Intercom installation.
Major airframe overhaul of plans built EZ.
Weight and balance for a LongEZ.
Weight and Balance spreadsheet download for a Long-EZ.
LongEZ fuel system design.
How To remove the wings from a LongEZ.
How To remove the canard from a LongEZ.
Waiters GPS Time sync program runs on PC.
How To remove the engine from a LongEZ.
Long-EZ Downdraft cooling for a Lycoming O-320.
Long-EZ Wing Removal and installation instructions.
Waiters Retractable Landing Gear Controller.
Landing Light installation in LongEZ.
Install free EFIS software on your PC.
How to Put several longezs in one hangar.
How to install an Infinity Aerospace Retractable landing gear in a Long-EZ.
How to install DownDraft cooling on a Long-EZ.
GPS Time.
Setting you computer clock to GPS time.
How to set your Computer clock to GPS Time.
Using your GPS Receiver to set your computers clock.
Low cost GPS receiver used to syncronize Computer clock to GPS time.
Neat Canopy stay system for an EZ.
Cabin Heat using engine oil as source.
Waiters GPS Time, Syncronize your PCs internal clock with the GPS satellite.
Remote display of EFIS on a PC.
Cabin Oil Heater for a LongEZ.
LongEZ Landing Gear Door.
Rigging a LongEZ Landing Gear door.
Icom Radio in LongEZ.
How to Build a Manometer.
LongEZ Electrical system upgrades.
Grand Rapids EMS.
Custom Windows cursors.
Custom Windows mouse pointers.
LongEZ Cowling for downdraft cooling.
Record holding LongEZ flights.
Using a PLC for a retractable Landing Gear Controller in a LongEZ.
Syncronize your PCs clock to a GPS receiver.
Airspeed vs pressure lookup tables.
How to build a homebuilt airplane.
Video of LongEZ taking off.
Grasscutter landing gear door.
EZ Nose Lift installation.
Landing Gear status indicator.
Shareware software can set your PC clock vie a GPS receiver.
Landing Gear controller computer for LongEZ.
Landing gear doors.
Dynon EMS10 installed in instrument panel of a LongEZ.
Dynon EFIS D10A installed in instrument panel of a LongEZ.
Flight Data Recorder Software.
PlansBuilt LongEZ.
Video of High G turn in a Long EZ.
Strong Pitch Trim system installed in a LongEZ.
Strong Pitch Trim mounted on Left Side of Long-EZ.
Free software sets your PC clock with a GPS receiver.
Video of LongEZ Taking off.
Video of LongEZ Landing.
Video of LongEZ performing a high G turn.
Video of Infinity Landing gear being retracted into a LongEZ.
LongEZ Color White.
Painting your LongEZ.
White LongEZ.
Camoflage LongEZ.
Infinity Landing Gear for LongEZ.
Strong Pitch system.
|